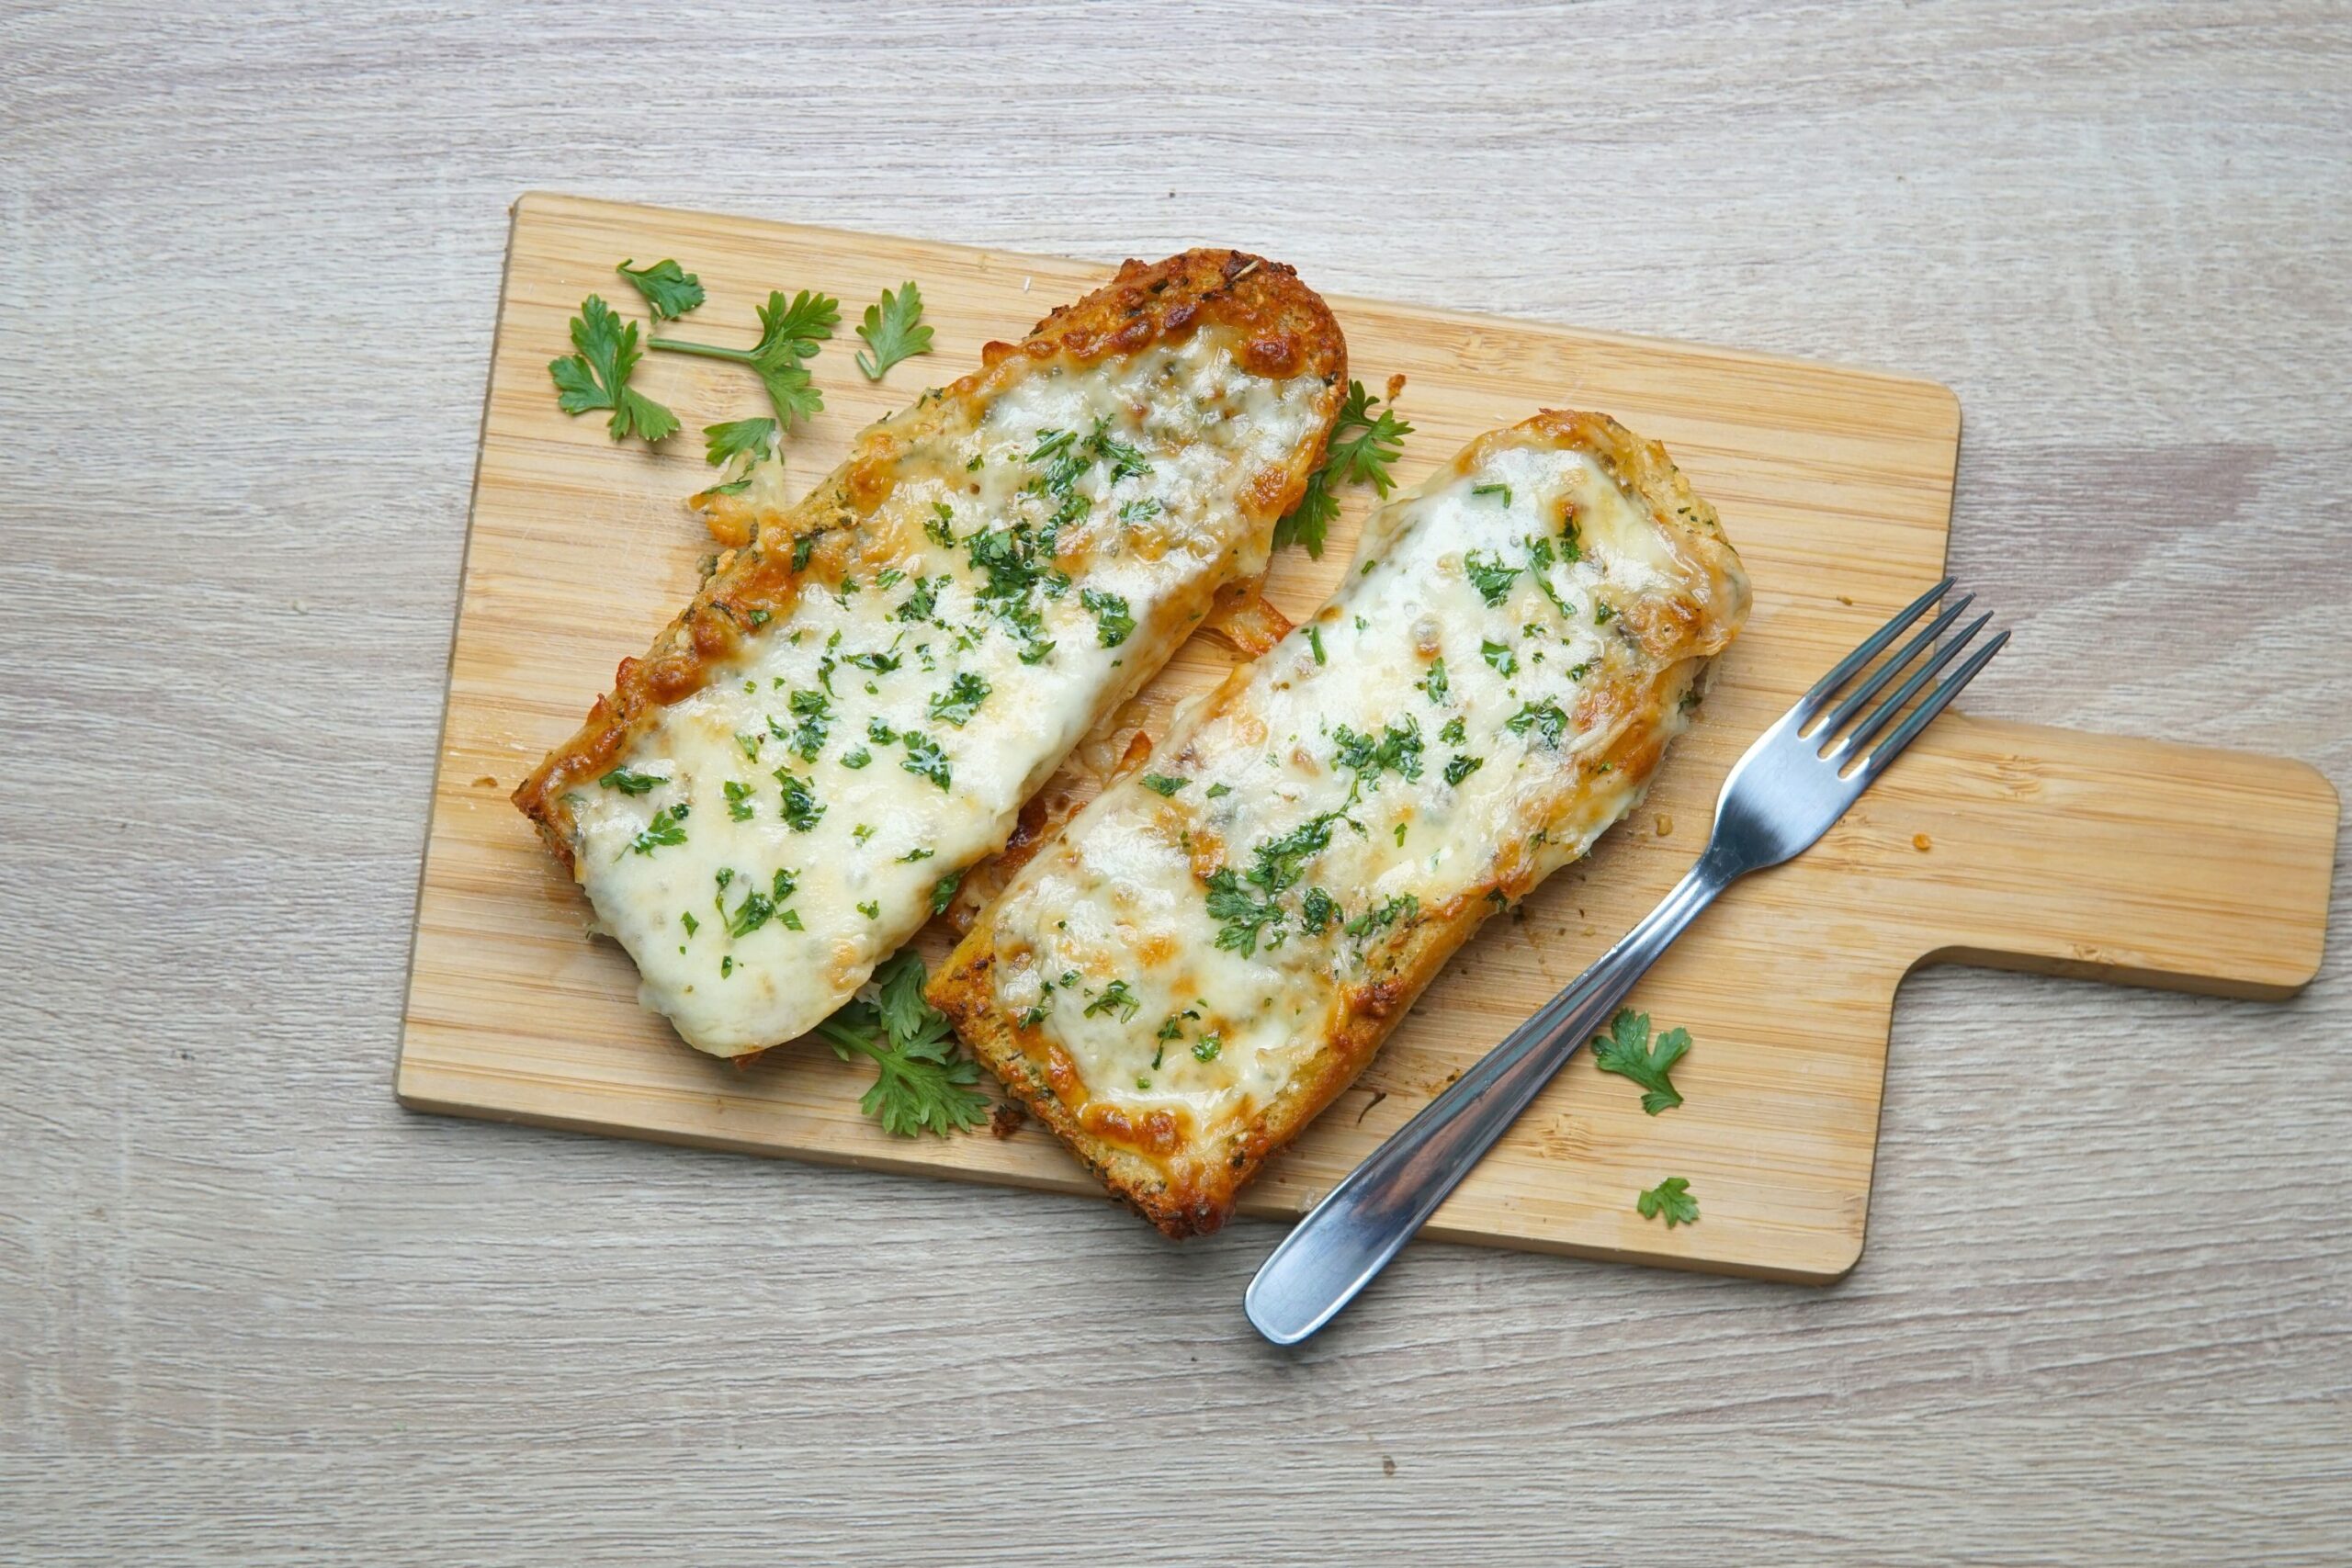
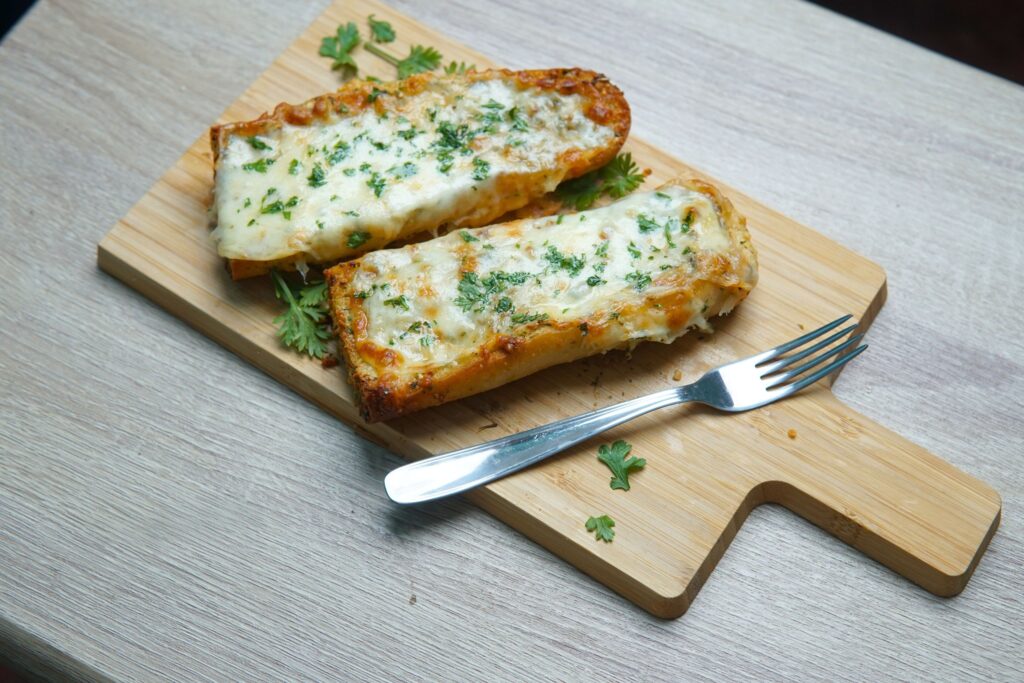
Garlicky, buttery, and cheesy! There’s nothing else that I could ask for with this Mozzarella Garlic Bread recipe made with an air fryer in under 20 minutes!

The Best Air Fryer Cheesy Garlic Bread Recipe
2
servings15
minutes10
minutes486
kcal27
minutesThis quick and flavorful garlic bread combines a crispy baguette with a good blend of softened butter, minced garlic, fresh parsley, and Italian seasoning. Topped with Parmesan and mozzarella cheese, it’s baked until golden, melty, and irresistibly fragrant.
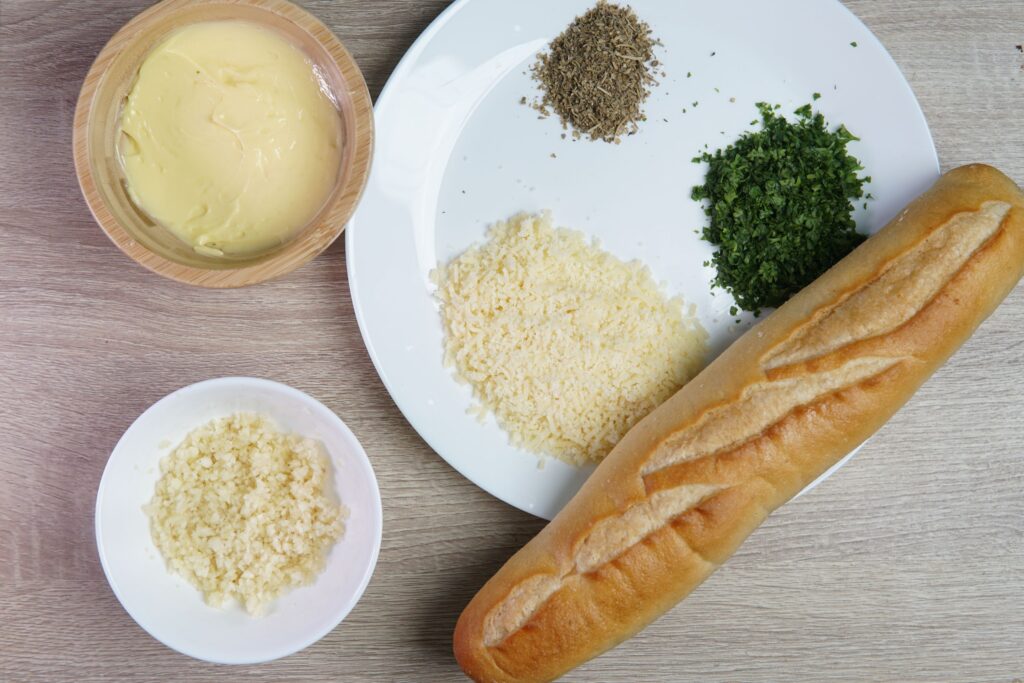
Ingredients
60 grams salted butter, softened
5 pieces cloves of garlic, minced
2 tablespoons Parmesan Cheese, grated
1 tablespoon fresh parsley, chopped
1 teaspoon Italian seasoning
1 teaspoon ground black pepper (optional)
1 piece Mini baguette or any bread of your choice
1/2 cup Mozzarella Cheese, grated
1/2 tablespoon Fresh Parsley (for garnish)
Directions
- Garlic Butter
- Soften the bread by leaving it at room temperature for at least 15 minutes, or by heating it in the microwave on low power for 5 to 10 seconds.
- Finely chop 4 to 5 cloves of garlic and fresh parsley with a sharp knife, dicing them as small as possible. The finer, the better. Avoid leaving large chunks.
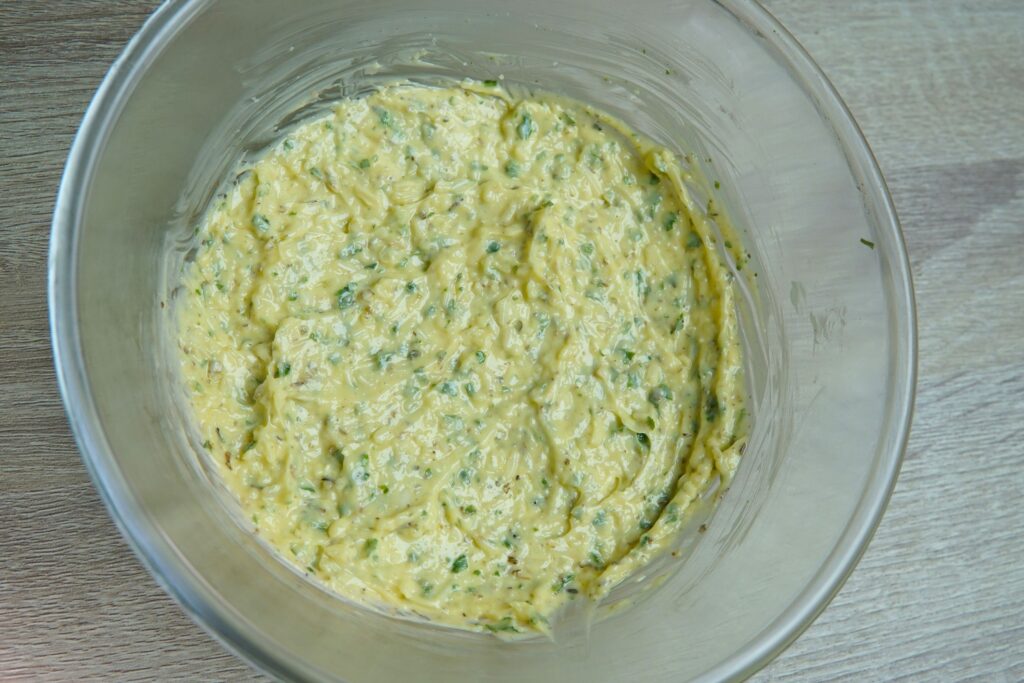
- In a bowl, combine 60 grams of half a stick of softened salted butter, chopped garlic, 2 tablespoons of grated Parmesan Cheese, 1 tablespoon of chopped fresh parsley, 1 teaspoon of Italian seasoning, and 1 teaspoon of ground black pepper. Mix thoroughly until well blended.
- (Optional) You can try to taste your garlic butter to see if it needs adjustment. Take note of some red flags such as bitter, metallic, and sour taste.
- Garlic Bread
- Preheat the air fryer to 180°C (350°F) for 3 minutes.
- Slice the baguette in half lengthwise, or cut it into smaller pieces to make it easier to eat later without having to slice it again after baking.
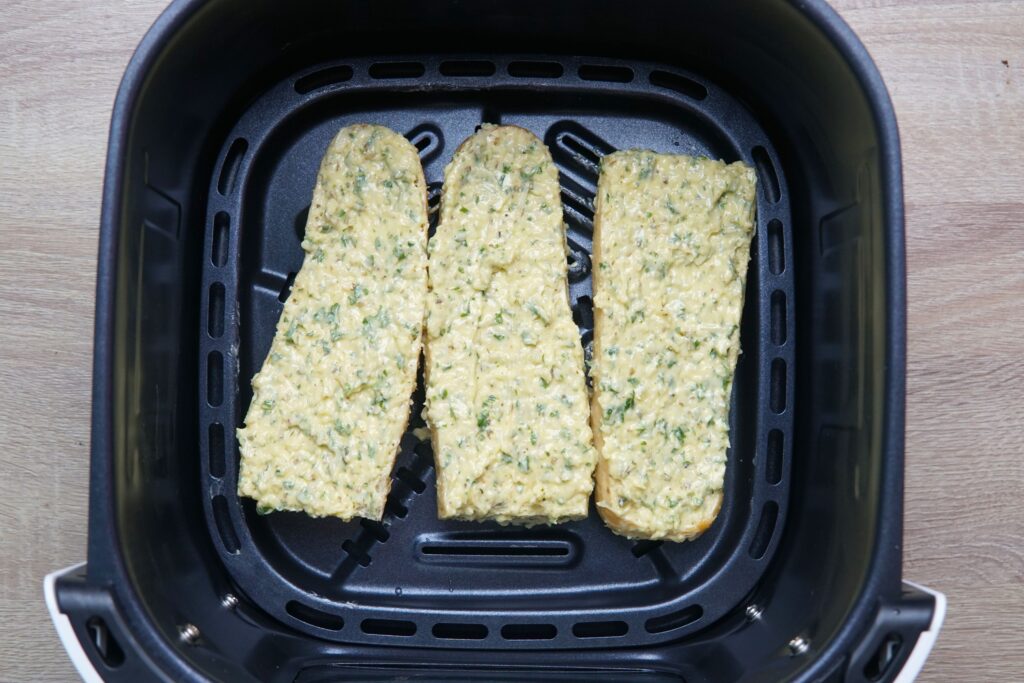
- Place the baguette on a flat surface and coat it with garlic butter. Using a butter knife, spatula, or spoon, generously spread the softened garlic butter over the bread. For a crunchier base or exterior, coat both the top-facing side and the edges.
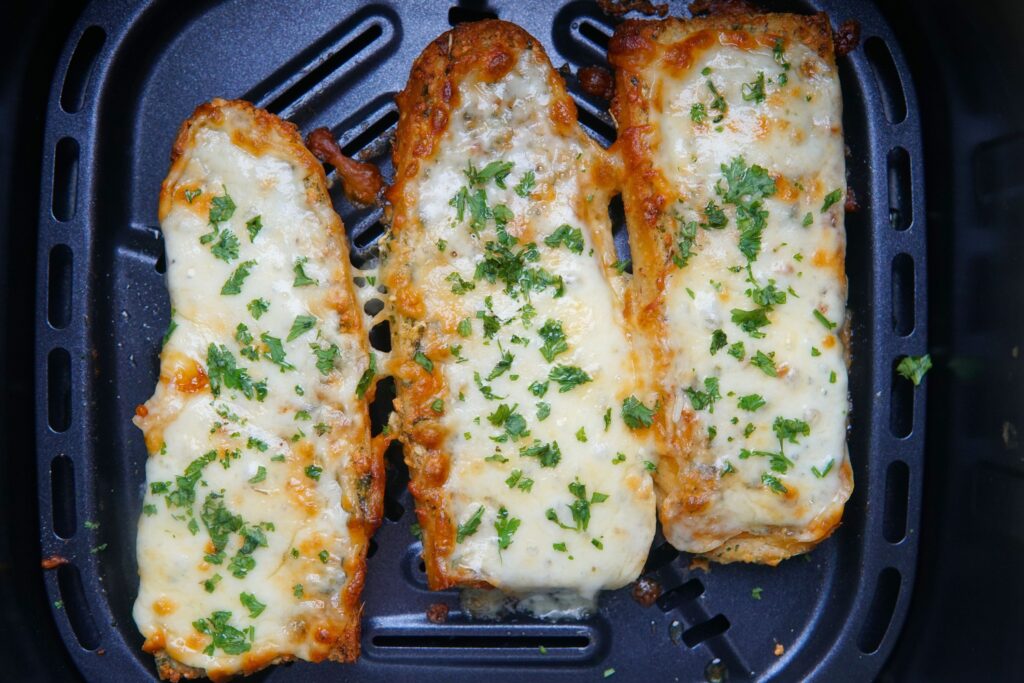
- Place the bread in the air fryer and cook for 10 minutes. With about five to seven minutes remaining, open the air fryer and sprinkle a generous amount of mozzarella over the top. Continue cooking until the bread is golden brown with crispy edges and the mozzarella is melted with small blisters.
- Finish with a sprinkle of chopped parsley before serving. For extra flavor, add other herbs of your choice or drizzle lightly with truffle oil.
Notes
- Adjust time and temp: Note that air fryer models vary, and some may require or lower or higher cooking times and temperatures.
- Do not overcrowd: Arrange garlic bread slices in a single layer with enough space between for even airflow.
Did you make this recipe?
Tag @cookingdex on Instagram and hashtag it with
Like this recipe?
Follow @cookingdex on Pinterest
Why you’ll love this recipe
Garlic Bread has always been the perfect pair for most of my favorite dishes, such as lasagna and chicken Alfredo. Now, it’s even more delightful after realizing I can make this godsend dish in my air fryer. Here’s what I love about it:
- Crispy edges with buttery and fluffy center: This has always been garlic bread’s main selling point. With every crispy bite, you’re welcomed by soft, buttery insides. Something that truly melts in your mouth.
- Garlic flavor: Freshly minced garlic does the trick when it comes to bringing out that bold, garlicky taste. You can also use roasted garlic!
- Quick and easy: All you have to do is grab your favorite bread, prepare your garlic butter, and pop it in the air fryer. You can also freeze them and turn them into convenient make-ahead meals.
- Crowd favorite: Everybody loves garlic bread. Kids, busy folks, and even the elderly. Because of that, leftovers are almsot never a problem.
Garlic Bread Ingredients
Find all of the Garlic Bread ingredients, and what makes them a good addition to it.
- Bread: French baguette is the top choice for garlic bread, but you can also use other types such as ciabatta, Italian bread, or sourdough. Ideally, choose a bread that’s crispy on the outside and soft on the inside.
- Garlic: When it comes to garlic, fresh or roasted garlic are hands down the best option if you’re aiming for an authentic taste. While I recommend using fresh garlic, feel free to mix it with garlic powder.
- Parsley: Used both for garlic butter and garnishing. It adds color and the minty, peppery taste of it is a nice touch too.
- Butter: The aroma of fresh garlic and butter cooking together is just chef’s kiss. Even better, once the butter has absorbed all the garlic, parsley, and seasonings, it spreads smoothly over the bread. I used salted butter in this recipe, but feel free to use unsalted instead. Just add salt to match the level of saltiness you prefer.
- Seasoning: Italian seasoning, salt, and pepper to taste.
- Cheese: This recipe uses two types of cheese. Parmesan and Mozzarella. Parmesan goes into the garlic butter, while the Mozzarella is added on top of the bread toward the end of cooking for a perfectly melted, cheesy finish.
Best bread for Air Fryer Garlic Bread
Now, let’s talk about the bread itself, the base where the garlic butter will melt. Here are the best breads to choose from:
Baguette
Baguette is known for its golden, crispy exterior and soft interior, which essentially makes it perfect for our garlic bread. It also has nice holes inside that make it easier for the garlic mixture to seep in.
Italian Bread
Here’s to my second favorite. Sometimes, a softer crust is exactly what hits the spot, and that’s when Italian bread becomes ideal for garlic bread. Even if you prefer it crispier, you can still achieve that, as the air fryer can easily do the job. It crisps up Italian bread beautifully without sacrificing the softness inside.
Sourdough
Sourdough is another great candidate for air fryer garlic bread. If you’re after the sour and tangy flavor of bread, go with sourdough instead. Additionally, if you’re leaning toward the healthier side, sourdough might be the best choice for you.
Other great options are Ciabatta, Focaccia and Brioche. Avoid using thin bread slices such as white sandwich bread or pre-sliced loaf bread, as they can toast too quickly before the garlic has a chance to cook through.
How to Prepare your Garlic Butter from Scratch?
If you’re in the Garlic butter part, don’t worry as it is easy to make, especially if you’re following these steps and tips.
Use softened butter
The rule of thumb when making garlic butter is that YOU MUST ONLY USE SOFTENED BUTTER! Not cold butter, not frozen butter and not even melted and liquid butter. Uing cold or frozen butter makes it difficult to mix in the garlic and herbs properly. You’ll likely end up with uneven flavor: one part overloaded with garlic, another nearly bland. Plus, cold butter is barely spreadable. Chances are it won’t spread evenly, and in the worst-case scenario, you might even tear your bread.
As for melted butter that’s fully liquid, it can work, but personally, I wouldn’t recommend it. While the ingredients do blend evenly, just like with softened butter, I find that melted butter tends to make the garlic bread a bit dry once it’s cooked.
Now, what are the ways to soften butter?
You can either leave the butter at room temperature or microwave it. Place it in a clean container, cut it into cubes, or grate it with a cheese grater, then let it sit for about 15 minutes. If you’re short on time, place the butter in the microwave and heat it on low power or the defrost setting for about five seconds.
Garlic
You have various options when it comes to garlic. Freshly minced or grated garlic, roasted garlic, garlic powder, garlic salt, granulated garlic, garlic paste, but which is better?
For garlic bread specifically, you’ll want to go for freshly minced garlic, grated garlic, or garlic paste. You’ll get a much more authentic taste with real garlic rather than garlic powder or granulated garlic, and these forms blend easily with butter for even distribution. As for minced garlic, just be sure to chop it finely to avoid chunks.
How to mince Garlic?
Mince garlic by first separating the cloves from the bulb. Remove the skin by pressing the clove with the flat side of a knife using the heel of your hand. Next, trim off the root end and slice the clove into thin strips. Finally, chop the strips crosswise until no large chunks remain.
Now, if mincing and chopping intimidate you, that’s alright! Especially if you’re new to the kitchen, knives can definitely be challenging. If chopping doesn’t seem like an option, you can always purchase and use a garlic press instead.
Taste and adjust
Go ahead and taste your garlic butter to see if it needs a bit more salt or herbs. Don’t worry, it’s safe!
Don’t add burnt garlic!
Garlic is what gives garlic bread its savory flavor and irresistible aroma. However, that all changes when the garlic burns. Burnt garlic turns noticeably darker and gives off a harsh, bitter smell and taste. To avoid this when cooking garlic bread, make sure not to leave it in the air fryer for too long.
How to make the best Air Fryer Mozzarella Garlic Bread
Now that you’ve prepared your garlic butter mixture, it’s time to make your Mozzarella Garlic Bread in the Air Fryer!
- Preheat your Air Fryer to 180°C (350°F) for three to five minutes, or depending on the instructions. We highly recommend preheating as this will help you achieve that crispy edge!
- Grab your bread, and use a butter knife to spread the garlic butter over the top side. Do a thin layer first, before adding another layer so you can easily avoid clumps. Also, don’t forget to cover the crust for extra flavor. Once settled, try to press the mixture gently onto the bread.
- Top the garlic bread with a handful of grated Mozzarella cheese. When I make these at home, I often sprinkle some ground black pepper and Italian seasoning too. Now, if you want to become a little bit extra like me, you can add a few toppings such as Pepperoni slices, bacon bits, sausage, cheddar, and more.
- Let the garlic bread cook for 10 minutes! Ten minutes should be enough to turn the bread crispy and melt the cheese. Note that each air fryer model is different. If this is your first time cooking, you may want to observe the garlic bread closely. Your air fryer may cook the bread faster than mine. Cook the garlic bread until it turns golden brown and you start to see blisters on the mozzarella cheese. Remember not to overcook the garlic, as it can develop a bitter taste.
- Flip it once during cooking for consistent crispiness.
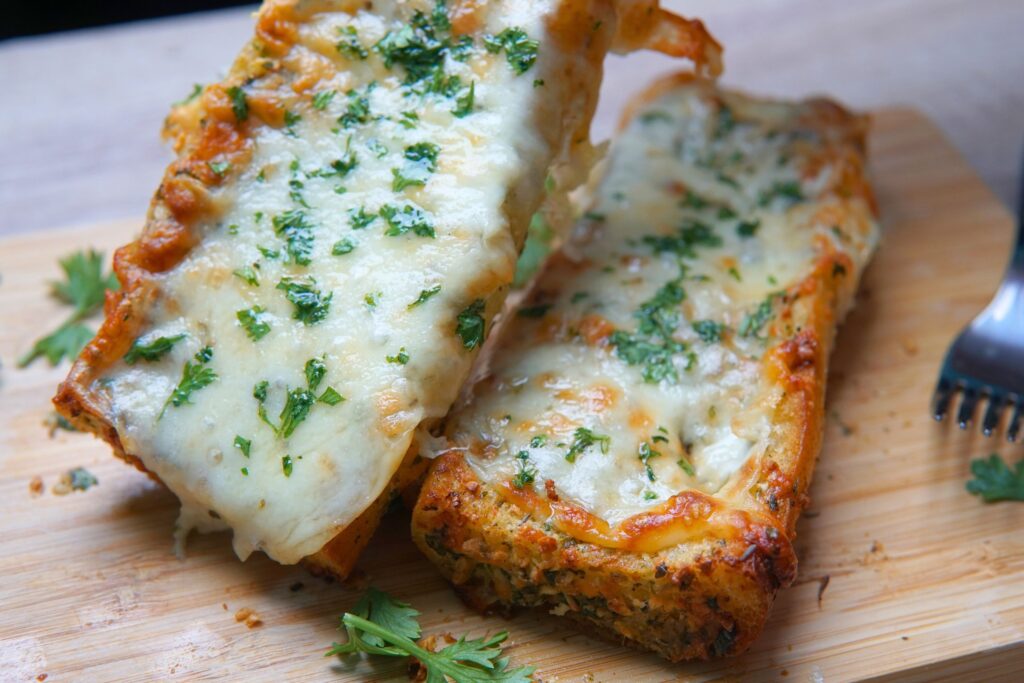
- Serve it warm or hot! Garnish with finely chopped fresh parsley, basil, or chives.
How to Store Air Fryer Cheesy Garlic Bread Leftovers
If you still have leftovers, you can store them for later. Here’s how:
Let the garlic bread cool completely before placing it in the fridge. Wrap it in foil or seal it in a ziplock bag, then refrigerate. It should stay fresh for up to 4 days and will still be safe to eat after reheating.
You can also freeze garlic bread, it will remain good for up to a month.
How to reheat Air Fryer Cheesy Garlic Bread Leftovers
You can reheat your Garlic Bread leftovers using an oven, air fryer, or microwave. If frozen, it’s okay. You can reheat it in any appliance of your choice without needing to thaw it. Just add

- Oven: Preheat your oven to 350°F or 175°C then wrap your leftover garlic bread in aluminum foil. Heat it for about 10 to 15 minutes.
- Air fryer: Preheat your oven to 350°F or 175°C. Transfer your leftover garlic bread in the basket, and make sure there’s enough space between them, if you’re reheating multiple slices. Reheat for about 3 to 4 minutes.
- Microwave: Place your garlic bread on a microwave-safe plate and heat it on medium power for 10–15 seconds. Do note, however, that compared to an oven, air fryer, or toaster, the microwave will give you less crispy results.
Either way is fine. Salted butter means you don’t need to add much salt to the mix, and the saltiness is evenly distributed throughout the butter. Unsalted butter, meanwhile, allows you to control the saltiness in your garlic bread.
Fresh garlic is the best choice for garlic bread, and garlic bread is only ideal as an additional or substitute ingredient. While adding fresh garlic adds a lot more work, this gives a more garlicky flavor than the store-bought powder or granulated garlic.
Yes! You can refrigerate it after transferring it into an airtight container, jar, or plastic bag. Meanwhile, if you freeze it, you can store it for up to a month. This is a recommended option if you don’t want to refrigerate
Garlic Bread is not supposed to taste bitter. If your garlic butter tastes like it, possible causes might be burnt garlic, or too much garlic in the mixture.
Estimated Nutrition
Note: The nutrition details provided are based on general calculations and may not reflect exact results. Actual values can differ depending on the ingredients used, portion sizes, and how the food is prepared. Use this as a general guide, not a medical or dietary recommendation.
Nutrition Facts
2 servings per container
Serving Size147
- Amount Per ServingCalories486
- % Daily Value *
- Total Fat
27.5g
35%
- Saturated Fat 16.6g 80%
- Trans Fat 1g
- Cholesterol 74mg 25%
- Sodium 1020mg 45%
- Total Carbohydrate
42g
16%
- Dietary Fiber 3g 11%
- Total Sugars 4g
- Protein 19g 38%
- Vitamin A 26mcg 3%
- Vitamin C 12mg 14%
* The % Daily Value tells you how much a nutrient in a serving of food contributes to a daily diet. 2,000 calories a day is used for general nutrition advice.
Thanks for giving this recipe a try! Hope it brought as much flavor to your table as it did to mine. If you enjoyed it, don’t forget to share your creation, tag me on TikTok, Instagram, Pinterest, or Facebook so I can see your delicious version. While you’re at it, follow us on these platforms to stay updated on every new recipe we share.
For more easy and tasty recipes, please check out Cookingdex!
