
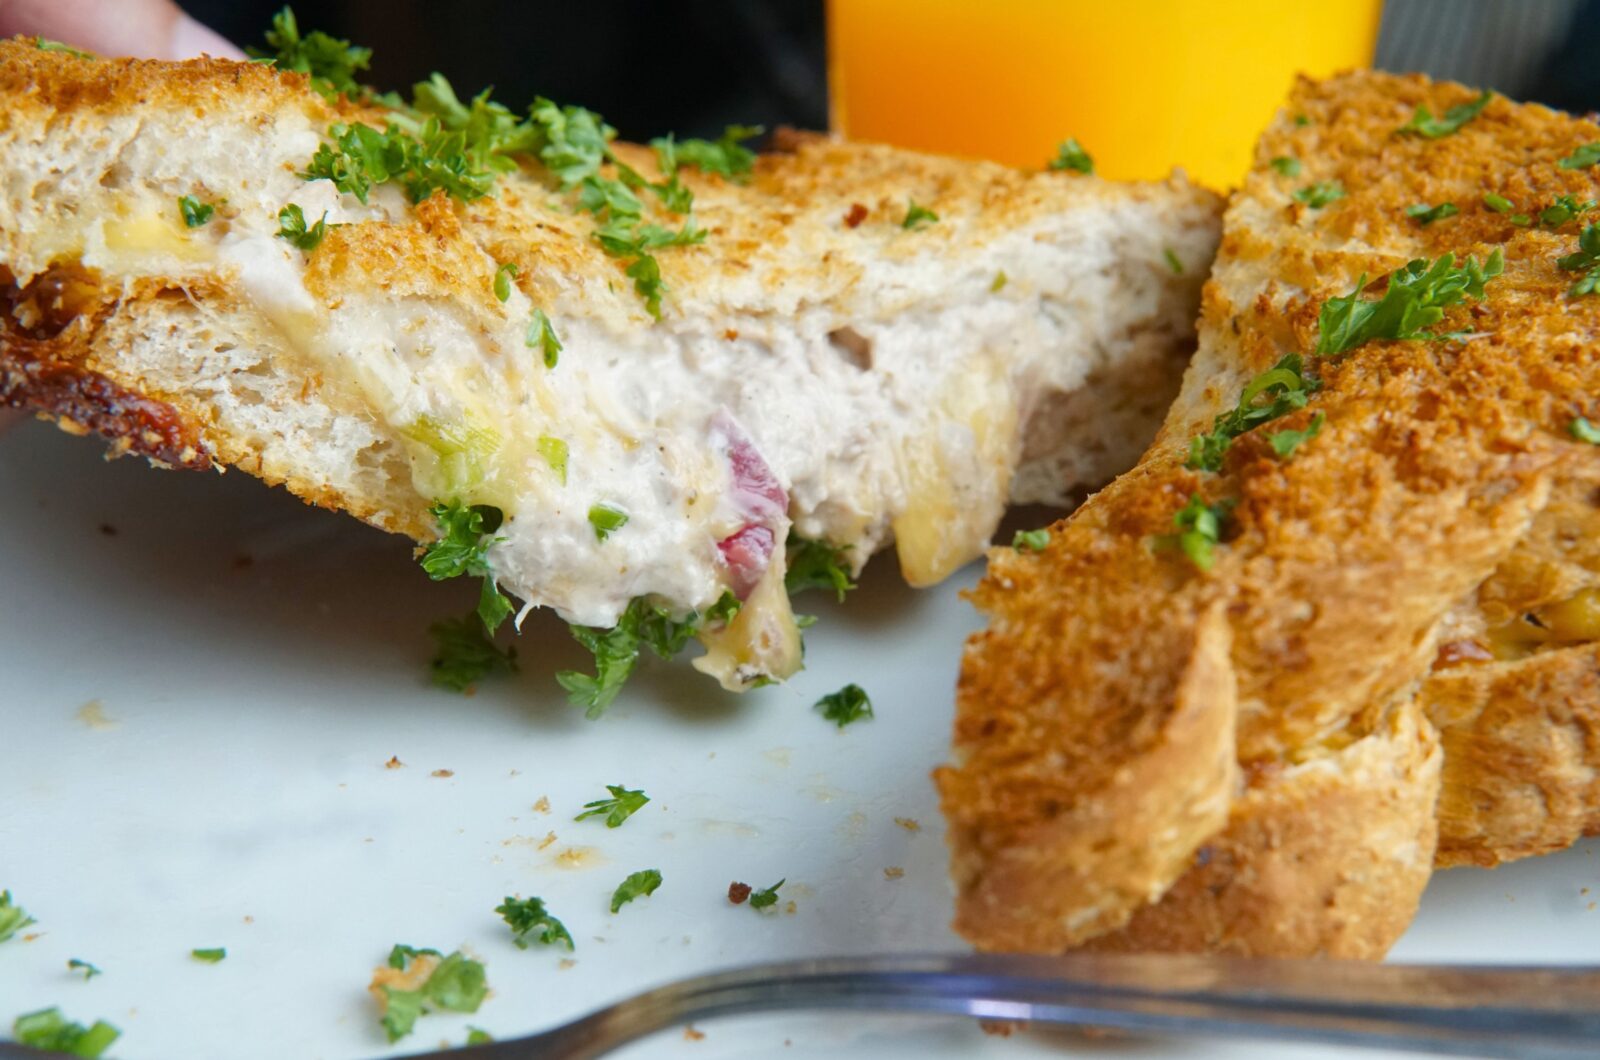
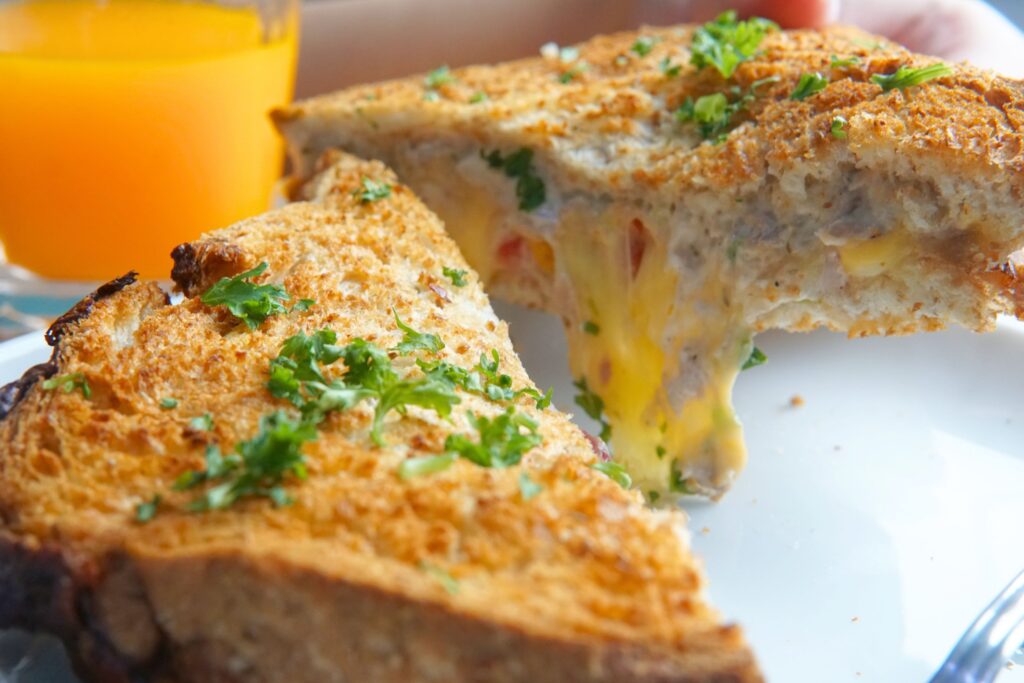
Grilled cheese has always been my favorite; for breakfast, snacks, or even dinner sometimes. But it can occasionally get boring and feel like it needs something more. That’s why the Tuna Melt Sandwich keeps me coming back. It’s the flavorful tuna flakes and gooey cheese sandwiched between crispy bread.
Crispy and Cheesy Air Fryer Tuna Melt Sandwich
2
servings15
minutes15
minutes887
kcal30
minutesThis Air Fryer Tuna Melt Sandwich combines flaky oil-packed tuna mixed with mayo, onion, lemon juice, and seasonings, layered on bread with creamy cheddar cheese. Air-fried until golden and melty.
Ingredients
- Tuna Salad
1 piece small-sized onion, chopped
2 stalks green onions, chopped
1 piece medium tomato, diced and drained
1 piece oil-packed tuna, drained (6 to 7 ounce)
1 cup Mayonnaise
1 tablespoon 1 tablespoon Fresh Lemon Juice
1/2 teaspoon Garlic Powder
1/4 teaspoon ground black pepper, or to taste
1/4 teaspoon Salt, or to taste
- Air Fryer Tuna Melt Sandwich
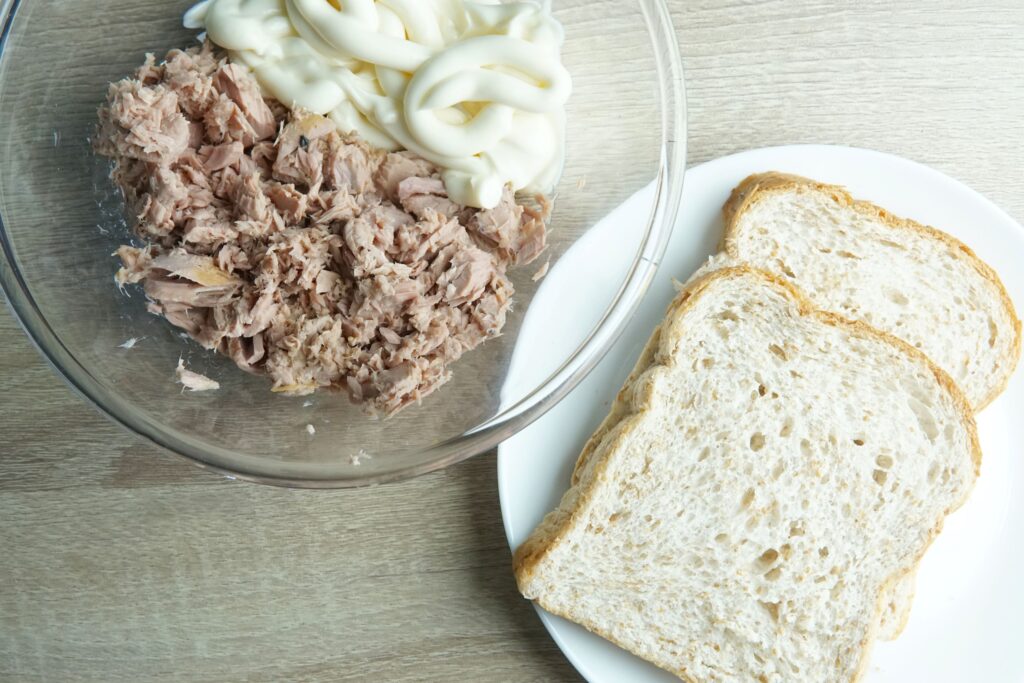
4 slices Bread
3 tablespoons mayonnaise
8 slices cheddar cheese
Directions
- Tuna Salad
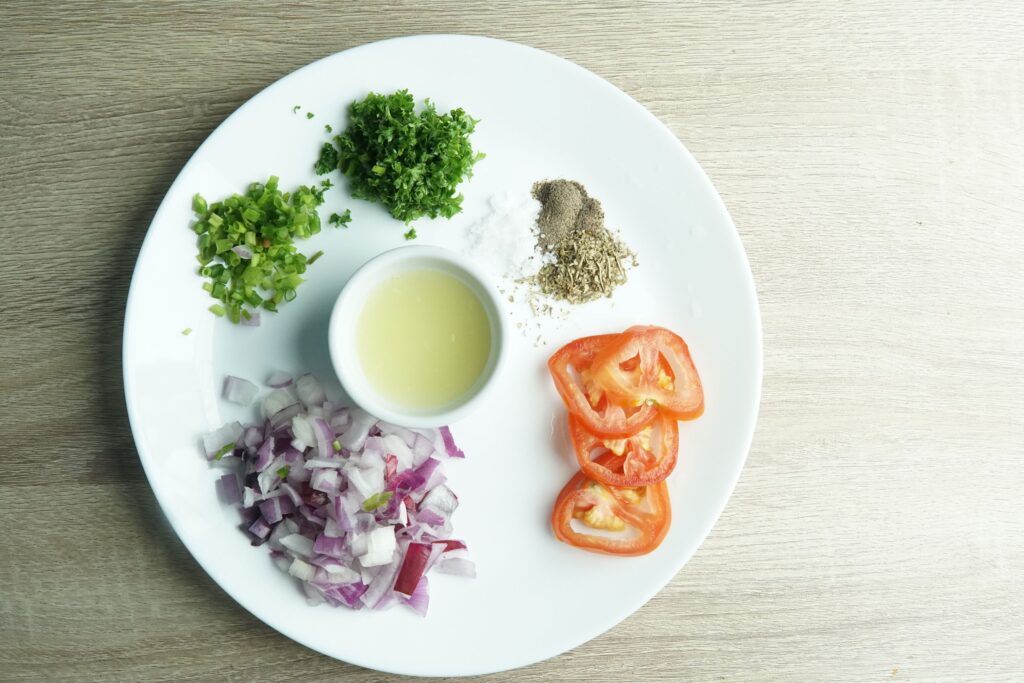
- Prepare the ingredients: On a chopping board, finely chop the green onions and red onion, then dice the tomatoes. Squeeze the juice from the lemon into a small bowl. Open the canned tuna and drain the liquid thoroughly.
- In a bowl, add the drained tuna and use a fork to flake it apart, breaking up any clumps. This makes it easier to combine with the other ingredients and ensures an even spread on the bread.
- Toss in the chopped red and green onions and diced tomato. Sprinkle with garlic powder, salt, and ground black pepper. Add the mayonnaise and freshly squeezed lemon juice, then mix until well combined.
- Air Fryer Tuna Sandwich Melt
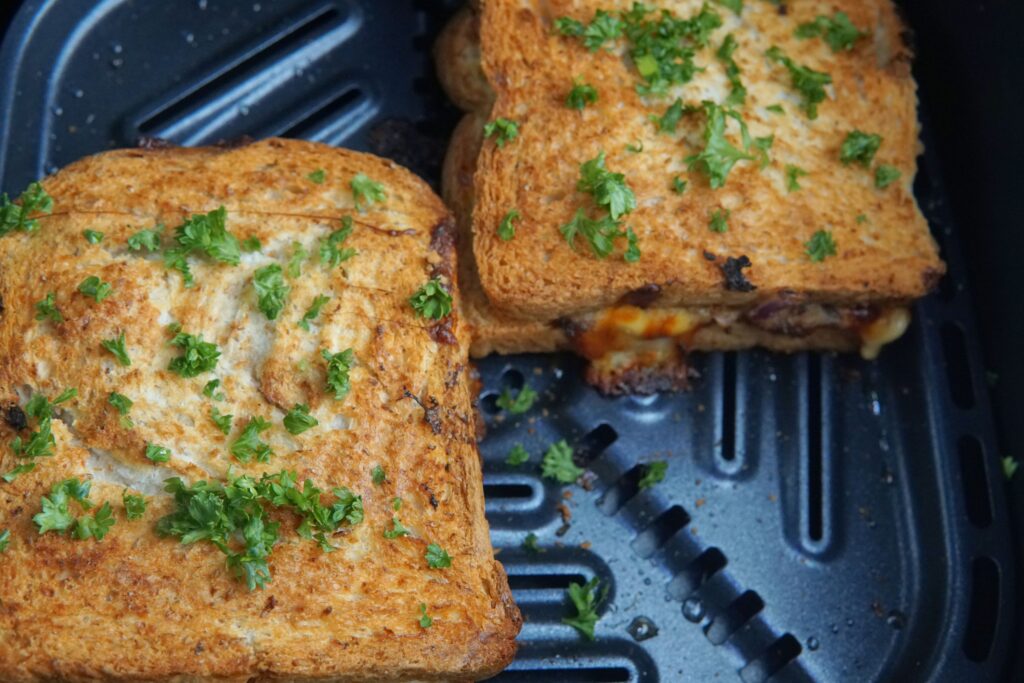
- Preheat the air fryer to 190°C or 380°F for three minutes.
- Grab a slice of bread, and lightly brush and coat it with mayonnaise. Place the bread inside the basket with the mayo side facing down.
- Start assembling your sandwich. First, add a slice of cheddar cheese. Next, scoop some tuna salad using a spoon and spread it evenly across the bread. Then, add another slice of cheese.
- Finally, take a second slice of bread and place it on top of the sandwich.
- Let the air fryer cook your Tuna Melt Sandwich for four minutes on each side. Depending on your air fryer model and toast preference, you may need to adjust the cooking time slightly.
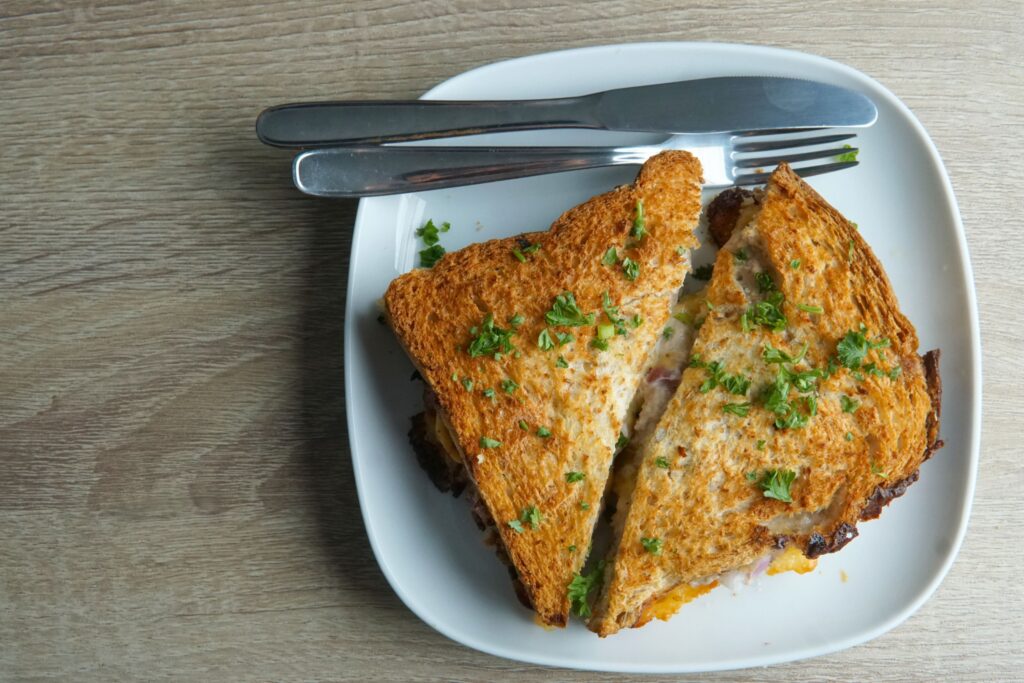
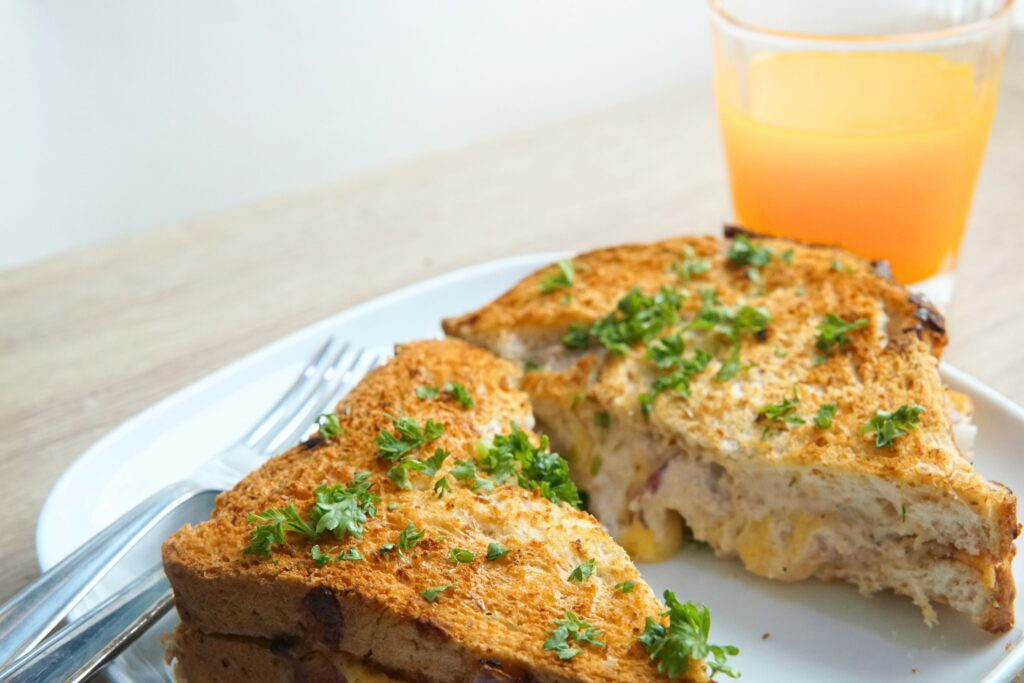
- Once cooked, carefully remove the basket and serve. Garnish with chopped fresh parsley.
Notes
- Adjust time and temp: Note that air fryer models vary, and some may require or lower or higher cooking times and temperatures.
- Do not overcrowd: If cooking multiple tuna melt sandwich, arrange them in a single layer with enough space in between to allow even airflow.
Did you make this recipe?
Tag @cookingdex on Instagram and hashtag it with
Like this recipe?
Follow @cookingdex on Pinterest
What is a Tuna Melt Sandwich
A Tuna Melt Sandwich combines tuna salad made with mayonnaise, seasonings, onions, and pickles, with cheddar cheese and golden, crisp bread. It’s crispy on the outside and soft on the inside. It just melts in the mouth. Well, much like grilled cheese, but with tuna.
This dish is traditionally made in a skillet, but after testing it in the air fryer, there’s really no turning back. Skillet cooking often leaves the bread unevenly toasted, and sometimes the cheese doesn’t fully melt. That’s on top of the mess it tends to create.
Meanwhile, an air fryer can cook more than two tuna melt sandwiches at once, depending on the basket size. Unlike a skillet, it doesn’t demand constant attention, no need to hover and flip just to keep the bread from burning.
Everything you need for the Tuna Melt Sandwich recipe
This Tuna Melt Sandwich comes together quickly and only needs a handful of ingredients.
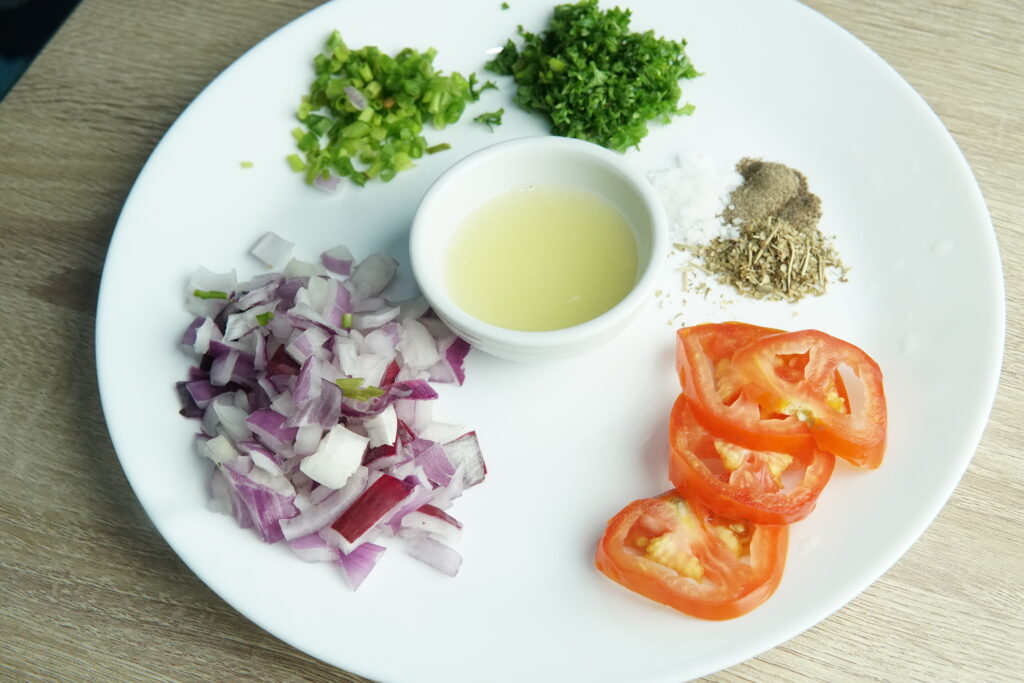
- Canned Tuna – You can choose any canned tuna that suits your taste and preference, whether it’s regular or spicy. Just make sure to drain all the excess liquid, as it could make your bread soggy.
- Mayonnaise – Use whatever mayonnaise you have at home. If possible, opt for real mayonnaise, as it helps bind the tuna and other ingredients more effectively. Low-quality mayonnaise tends to be thin or runny, which can ruin the tuna melt sandwich as it cooks.
- Tomato – Firm, ripe tomatoes are preferable. They release less liquid, which means they’re less likely to make the sandwich soggy.
- Vegetables – Red onions and green onions enhance the flavor of the tuna salad. You can also add diced celery or pickles.
- Bread – Any bread of your choice, such as white bread, sourdough, or whole wheat, will work. However, opt for thicker slices, as you’ll need something sturdy enough to hold the tuna salad, tomato, and cheese. Otherwise, it might all fall apart and ruin the sandwich.
- Cheese – Since this is a melt sandwich, use cheese that melts easily. In this recipe, I used cheddar cheese, but you can also go with Swiss, provolone, or cream cheese.
- Parsley – Use as a garnish.
Best Bread for Tuna Melt Sandwich
Choose any bread you have in your pantry, as long as it’s sturdy enough to hold the fillings yet soft inside to complement the creamy center. But if you want the best, here are some popular choices:
- Sourdough
- Brioche
- Italian Bread
- Whole Wheat Bread
- Rye bread
- Texas toast
How to make the best Air Fryer Tuna Melt Sandwich
Wanna know how to make the perfect Air Fryer Tuna Melt Sandwich? Here’s what you need to do.
- Prepare all the ingredients needed for this recipe. Chop and dice the onions, tomatoes, and squeeze lemon juice. Meanwhile, we highly suggest draining the liquid out of the canned tuna. The excess liquid from it can entirely destroy your sandwich and make it soggy.
- Next, break up the tuna and try to break any lumps so that it’s easier to blend with the other ingredients and can be spread easily and evenly on the bread.
- Time to prepare the tuna salad! Get a bowl and transfer all the vegetables, tuna, garlic powder, salt, ground black pepper, mayonnaise, and freshly squeezed lemon juice. Once each piece of tuna is coated with mayonnaise and there are no visible clumps, your salad is ready. The texture should look consistent throughout.
- Preheat the air fryer to 190°C or 380°F, or according to the instructions of your air fryer model!
- Get a slice of bread, and lightly coat one side with mayonnaise. This side becomes the bottom part, and you should place the mayo side facing down. Much like in a skillet, this will help you achieve that golden brown color. Spread that mayo evenly, and remember to only add a thin layer. Otherwise, it might only make your sandwich unnecessarily greasy.
- Place a slice of cheddar cheese over the spread, then take a spoonful of the tuna salad, and spread across the bread. If you want it extra cheesy, add another slice over the fillings.
- Get the second slice, and lightly coat one side with mayonnaise again. This time, this will go on top with the mayo side facing up.
- Set the timer for eight minutes, and cook each side in the air fryer for four minutes. Yup, don’t forget to flip it so both sides brown equally.
- After cooking, let it rest for a bit then serve.
Tips for the best Air Fryer Tuna Melt Sandwich
Wanna achieve the perfect Tuna Melt Sandwich in the air fryer? Follow these tips:
- If you’re using soft or thin bread, and you’re not confident that it can carry all that weight, you can pre-toast the bread in the air fryer for 2 to 3 minutes before adding the cheese and fillings.
- While it can be tempting to load up on fillings, try to resist especially when using thin bread. Too much filling can slip out during cooking or make the sandwich hard to flip.
What to serve this with
Whether it’s for a cozy dinner at home or a casual get-together, the right pairing can take it from good to unforgettable.
- Air Fryer Roasted Baby Potatoes
- Air Fryer Stuffed Potato Croquettes
- Crispy, Creamy, Dreamy Air Fryer Fried Oreos
- The Best Air Fryer Pepperoni Frittata
Can Air Fryer Tuna Melt Sandwiches be prepared ahead of time?
Absolutely! Tuna melt sandwiches are great for meal prep. Make the tuna salad ahead of time on a free day, then when you’re ready to eat, just assemble with cheese, pop it in the air fryer, and enjoy a fresh, melty sandwich in minutes.
- Make the Tuna salad or filling by mixing the chopped onion, green onions, tomato, drained tuna, mayonnaise, fresh lemon juice, garlic powder, ground black pepper and salt. Store in the container, and place in the fridge for up to three days.
- Pre-grate or slice cheese and again, store in another container inside the fridge.
- Assemble when ready to eat!
How to reheat Air Fryer Tuna Melt Sandwich
The best time to enjoy a Tuna Melt Sandwich is when it’s freshly served, hot from the air fryer. But who’s to say it can’t still be delicious once it’s cold? Here are the best ways to reheat your Air Fryer Tuna Melt Sandwich.
Airfryer
- Preheat your air fryer to 350°F (175°C) for about 3 minutes.
- Place the sandwich inside the basket and heat for 3–5 minutes, flipping halfway through.
- Check if the cheese is melted; add a few more seconds if needed.
Oven
- Preheat your oven to 350°F (175°C) for about 3 minutes.
- Wrap the sandwich in foil and place it on a rack or baking sheet.
- Heat for 10 minutes, flipping halfway through.
- If the cheese hasn’t melted or the bread hasn’t crisped up, add a few more seconds or minutes as needed.
Skillet
- Heat the skillet and add a bit of butter or oil if you want the bread to be extra crispy.
- Place the sandwich in the skillet and cover it with a lid to help the cheese melt.
- Cook for about 3 minutes per side, or until the bread is golden.
How to store an Air Fryer Tuna Melt Sandwich
You can store your Tuna Melt Sandwich in the fridge, sealed in an airtight container, and it will last for three to four days. Freezing it, on the other hand, will keep it for up to a month.
For the best quality, it’s better to prepare the tuna salad ahead of time and store it in the fridge. Then, assemble the sandwich only when you’re ready to eat. Some cheeses, like American cheese, tend to change texture after being frozen and reheated.
Yes, but sturdier breads like sourdough, whole wheat, or rye work best. Thin or soft breads may tear or get soggy, especially with generous fillings.
Sharp cheddar is classic, but mozzarella, provolone, or Swiss also melt beautifully. Mixing two types can enhance both flavor and texture.
Spread a thin layer of butter or mayonnaise on the outer sides of the bread before cooking, and avoid overfilling the sandwich.
Definitely. Popular add-ins include chopped celery, onions, pickles, jalapeños, herbs, or a sprinkle of paprika for flavor.
Estimated Nutrition
Note: The nutrition details provided are based on general calculations and may not reflect exact results. Actual values can differ depending on the ingredients used, portion sizes, and how the food is prepared. Use this as a general guide, not a medical or dietary recommendation.
Nutrition Facts
474 servings per container
- Amount Per ServingCalories887
- % Daily Value *
- Total Fat
48.7g
62%
- Saturated Fat 11.6g 56%
- Trans Fat 0.4g
- Cholesterol 80mg 27%
- Sodium 3948mg 172%
- Total Carbohydrate
47g
18%
- Dietary Fiber 2g 8%
- Total Sugars 15g
- Protein 63g 126%
- Vitamin A 21mcg 3%
- Vitamin C 100mg 112%
- Calcium 57mg 5%
- Iron 26mg 145%
* The % Daily Value tells you how much a nutrient in a serving of food contributes to a daily diet. 2,000 calories a day is used for general nutrition advice.
Thanks for giving this recipe a try! Hope it brought as much flavor to your table as it did to mine. If you enjoyed it, don’t forget to share your creation, tag me on TikTok, Instagram, Pinterest, or Facebook so I can see your delicious version. While you’re at it, follow us on these platforms to stay updated on every new recipe we share.
For more easy and tasty recipes, please check out Cookingdex!
